Hands-on Backend using Hono
Build a Hono backend with upload and static file routes, then write its Dockerfile and run it in a container.
- series
- Docker Workshop
- episode
- ตอนที่ 7 จาก 17
- read
- อ่าน 9 นาที
Installing
npm create hono@latestyarn create honopnpm create hono@latestbun create hono@latestdeno run -A npm:create-hono@latestผมก็จะใช้ pnpm
❯ pnpm create hono hono.../Library/pnpm/store/v3/tmp/dlx-30573 | Progress: resolved 1,.../Library/pnpm/store/v3/tmp/dlx-30573 | +1 +.../Library/pnpm/store/v3/tmp/dlx-30573 | Progress: resolved 1,.../Library/pnpm/store/v3/tmp/dlx-30573 | Progress: resolved 1, reused 0, downloaded 1, added 1, donecreate-hono version 0.9.2✔ Using target directory … my-app? Which template do you want to use? nodejs✔ Cloning the template? Do you want to install project dependencies? yes? Which package manager do you want to use? pnpm✔ Installing project dependencies🎉 Copied project filesจะได้ files แบบนี้
.├── flake.lock├── flake.nix├── global.d.ts├── package.json├── pnpm-lock.yaml├── README.md├── src│ └── index.ts└── tsconfig.json`Start Dev server
pnpm run devAdd route
ที่ไฟล์
src/index.ts
เพิ่ม route อันนึง
import { serve } from "@hono/node-server";import { Hono } from "hono";
const app = new Hono();
app.get("/", (c) => {  return c.text("Hello Hono!");});
app.get("/healthz", (c) => c.text("Ok"));
const port = 3333;console.log(`Server is running on port ${port}`);
serve({  fetch: app.fetch,  port,});
เปิดใน browser
Add upload file routes
เราจะทำ route ที่เอาไว้รับการ upload file จาก frontend ใน hono ทำได้ง่ายมากๆ ไม่ต้องมี libs อะไรเพิ่มเลย
สร้าง folder /uploads มาก่อน
.├── flake.lock├── flake.nix├── global.d.ts├── package.json├── pnpm-lock.yaml├── README.md├── src│ └── index.ts├── tsconfig.json└── uploadsimport { serve } from "@hono/node-server";import { Hono } from "hono";import { writeFile } from "node:fs/promises";import path from "node:path";
const app = new Hono();
app.get("/", (c) => { return c.text("Hello Hono!");});
app.get("/healthz", (c) => c.text("Ok"));
app.post("/uploads", async (c) => { const body = await c.req.parseBody(); const file = body.file; // string | File if (file instanceof File) { const folder = "./uploads"; const fullPath = path.join(folder, file.name); const arrBuf = await file.arrayBuffer(); const buf = Buffer.from(arrBuf); writeFile(fullPath, buf); return c.text("upload ok"); } c.status(400); return c.text("file missing");});
const port = 3333;console.log(`Server is running on port ${port}`);
serve({ fetch: app.fetch, port,});ลองใช้ hoppscotch ทำการ upload file เข้ามา
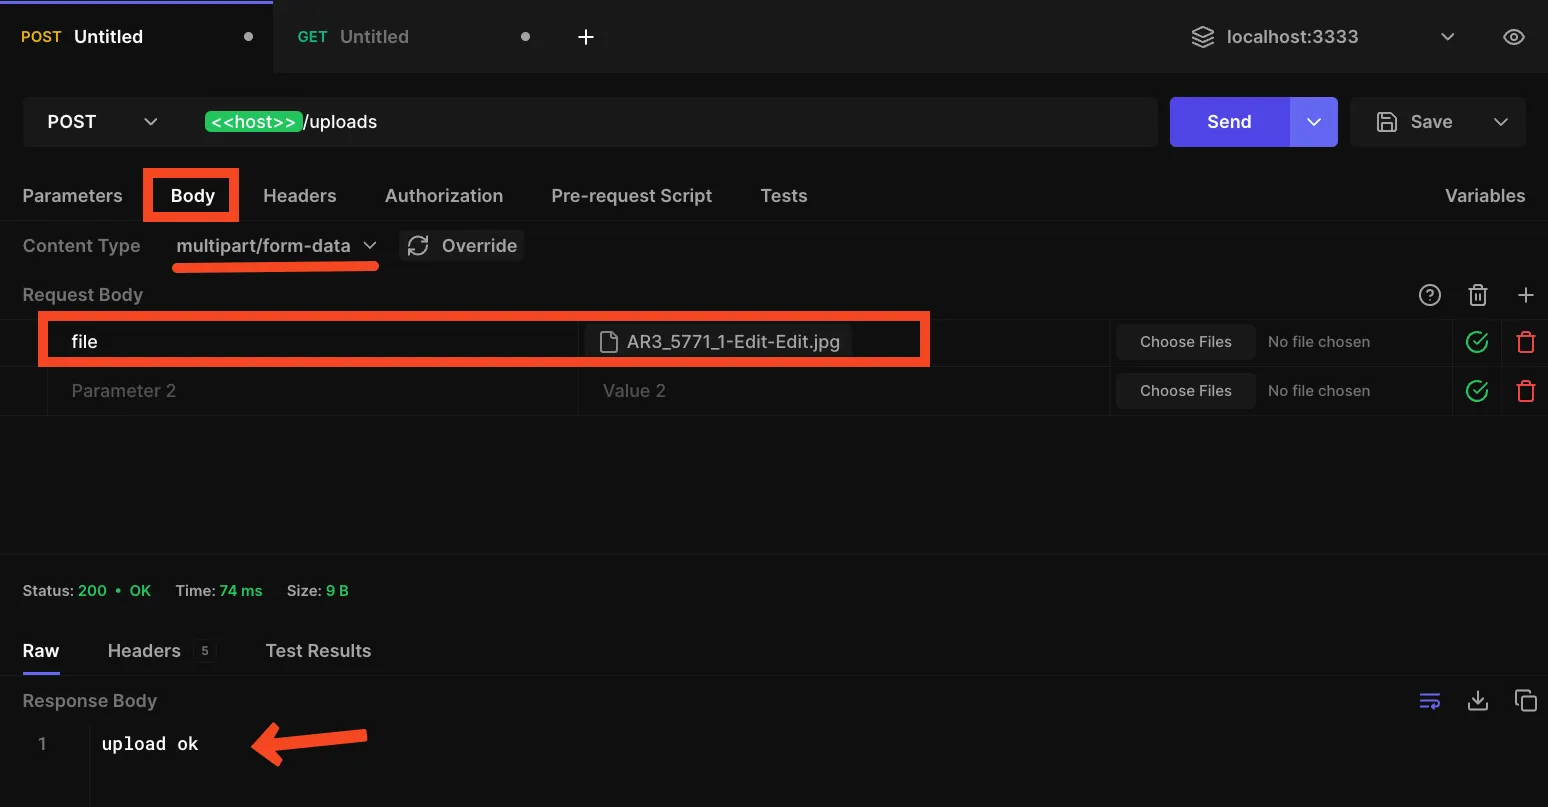
ดูที่ folder จะเห็นว่ามี file เพิ่มมาแล้ว
.├── flake.lock├── flake.nix├── global.d.ts├── package.json├── pnpm-lock.yaml├── README.md├── src│ └── index.ts├── tsconfig.json└── uploads └── AR3_5771_1-Edit-Edit.jpgServe static file
upload file ได้แล้ว เราก็ต้องให้คน download กลับไปได้ด้วย
ใน Hono ก็ทำได้ง่ายๆ ไม่ต้องมี lib อะไร
import { serveStatic } from "@hono/node-server/serve-static";
app.get(  "/static/*",  serveStatic({    root: "./",    rewriteRequestPath: (path) => path.replace(/^\/static/, "/uploads"),  }),);
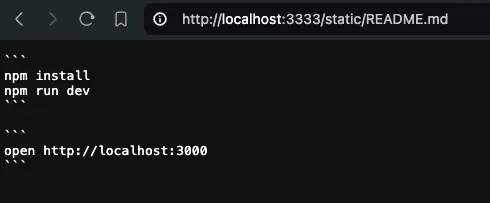
การเรียกดู file ที่ uploads เข้ามาจะต้อง GET มาที่ http://localhost:3333/static/file-name
hono server ก็จะวิ่งไปที่ folder ./uploads/file-name
Create Dockerfile
เราได้เรียนรู้การสร้าง Dockerfile ด้วยมือไปแล้ว แต่จริงๆมันง่ายกว่านั้น Docker เขาเตรียม CLI มาให้เราแล้ว
docker initแล้วก็ใส่ ข้อมูลไปตามคำถาม
❯ docker init
Welcome to the Docker Init CLI!
This utility will walk you through creating the following files with sensible defaults for your project:  - .dockerignore  - Dockerfile  - compose.yaml
Let's get started!
? What application platform does your project use? Node? What version of Node do you want to use? 22.2.0? Which package manager do you want to use? pnpm? What version of pnpm do you want to use? 8.15.5? What command do you want to use to start the app? npm run start? What port does your server listen on? 3333
CREATED: .dockerignoreCREATED: DockerfileCREATED: compose.yaml
✔ Your Docker files are ready!
Take a moment to review them and tailor them to your application.
When you're ready, start your application by running: docker compose up --build
Your application will be available at http://localhost:3333
จะเห็นว่ามี files เพิ่มเข้ามาละ
.├── .dockerignore├── .envrc├── .gitignore├── compose.yaml├── Dockerfile├── flake.lock├── flake.nix├── global.d.ts├── package.json├── pnpm-lock.yaml├── README.md├── src│ └── index.ts├── tsconfig.json└── uploads └── AR3_5771_1-Edit-Edit.jpgข้างในมีอะไรบ้าง ก็ตามนี้
# Include any files or directories that you don't want to be copied to your# container here (e.g., local build artifacts, temporary files, etc.).## For more help, visit the .dockerignore file reference guide at# https://docs.docker.com/engine/reference/builder/#dockerignore-file
**/.classpath**/.dockerignore**/.env**/.git**/.gitignore**/.project**/.settings**/.toolstarget**/.vs**/.vscode**/.next**/.cache**/*.*proj.user**/*.dbmdl**/*.jfm**/charts**/docker-compose***/compose***/Dockerfile***/node_modules**/npm-debug.log**/obj**/secrets.dev.yaml**/values.dev.yaml**/build**/distLICENSEREADME.md# syntax=docker/dockerfile:1
# Comments are provided throughout this file to help you get started.# If you need more help, visit the Dockerfile reference guide at# https://docs.docker.com/engine/reference/builder/
ARG NODE_VERSION=22.2.0ARG PNPM_VERSION=8.15.5
FROM node:${NODE_VERSION}-alpine
# Use production node environment by default.ENV NODE_ENV production
# Install pnpm.RUN --mount=type=cache,target=/root/.npm \ npm install -g pnpm@${PNPM_VERSION}
WORKDIR /usr/src/app
# Download dependencies as a separate step to take advantage of Docker's caching.# Leverage a cache mount to /root/.local/share/pnpm/store to speed up subsequent builds.# Leverage a bind mounts to package.json and pnpm-lock.yaml to avoid having to copy them into# into this layer.RUN --mount=type=bind,source=package.json,target=package.json \ --mount=type=bind,source=pnpm-lock.yaml,target=pnpm-lock.yaml \ --mount=type=cache,target=/root/.local/share/pnpm/store \ pnpm install --prod --frozen-lockfile
# Run the application as a non-root user.USER node
# Copy the rest of the source files into the image.COPY . .
# Expose the port that the application listens on.EXPOSE 3333
# Run the application.CMD npm run start# Comments are provided throughout this file to help you get started.# If you need more help, visit the Docker compose reference guide at# https://docs.docker.com/compose/compose-file/
# Here the instructions define your application as a service called "server".# This service is built from the Dockerfile in the current directory.# You can add other services your application may depend on here, such as a# database or a cache. For examples, see the Awesome Compose repository:# https://github.com/docker/awesome-composeservices: server: build: context: . environment: NODE_ENV: production ports: - 3333:3333
# The commented out section below is an example of how to define a PostgreSQL# database that your application can use. `depends_on` tells Docker Compose to# start the database before your application. The `db-data` volume persists the# database data between container restarts. The `db-password` secret is used# to set the database password. You must create `db/password.txt` and add# a password of your choosing to it before running `docker-compose up`.# depends_on:# db:# condition: service_healthy# db:# image: postgres# restart: always# user: postgres# secrets:# - db-password# volumes:# - db-data:/var/lib/postgresql/data# environment:# - POSTGRES_DB=example# - POSTGRES_PASSWORD_FILE=/run/secrets/db-password# expose:# - 5432# healthcheck:# test: [ "CMD", "pg_isready" ]# interval: 10s# timeout: 5s# retries: 5# volumes:# db-data:# secrets:# db-password:# file: db/password.txtBuild Hono for Node
Hono ไม่ได้เตรียม build script มาให้เรา
เพราะว่ารันไฟล์ TS ตรงๆผ่าน tsx เลย
แต่เราจะ build สักหน่อยจะได้ไม่กินแรม
ติดตั้ง lib typescript ก่อน
❯ pnpm add -D typescriptAlready up to dateProgress: resolved 33, reused 11, downloaded 0, added 0, done
dependencies:- typescript ^5.5.2
devDependencies:+ typescript ^5.5.2
Done in 495ms
จากนั้นแก้ tsconfig.json
{ "compilerOptions": { "outDir": "./dist", "target": "ESNext", "module": "ESNext", "moduleResolution": "Bundler", "strict": true, "skipLibCheck": true, "types": ["node"], "jsx": "react-jsx", "jsxImportSource": "hono/jsx" }, "exclude": ["node_modules"]}แล้วก็เพิ่ม build script
{ "name": "hono", "type": "module", "scripts": { "dev": "tsx watch src/index.ts", "build": "tsc -b" }, "dependencies": { "@hono/node-server": "^1.11.4", "hono": "^4.4.10" }, "devDependencies": { "@types/node": "^20.11.17", "tsx": "^4.7.1", "typescript": "^5.5.2" }, "packageManager": "pnpm@8.15.5+sha1.a58c038faac410c947dbdb93eb30994037d0fce2"}Dockerfile
เราจะมาแก้ Dockerfile กัน
# syntax=docker/dockerfile:1ARG NODE_VERSION=22.2.0ARG PNPM_VERSION=8.15.5
# BuildFROM node:${NODE_VERSION}-alpine AS build
ENV NODE_ENV production
# Install pnpm.RUN --mount=type=cache,target=/root/.npm \  npm install -g pnpm@${PNPM_VERSION}

WORKDIR /app
RUN --mount=type=bind,source=package.json,target=package.json \  --mount=type=bind,source=pnpm-lock.yaml,target=pnpm-lock.yaml \  --mount=type=cache,target=/root/.local/share/pnpm/store \  pnpm install --frozen-lockfile
COPY . .
RUN pnpm run build && pnpm prune --prod
# FinalFROM node:${NODE_VERSION}-alpine AS runner
ENV NODE_ENV=productionWORKDIR /app
RUN mkdir -p ./uploadsRUN chown -R node ./uploadsRUN chmod 700 ./uploads
COPY --from=build  /app/dist ./distCOPY --from=build  /app/node_modules ./node_modulesCOPY --from=build  /app/package.json ./package.json
USER node
EXPOSE 3333
CMD npm run startCMD ["node", "dist/index.js"]
Build docker image
docker build -t hono .❯ docker build -t hono .[+] Building 6.7s (22/22) FINISHED docker:orbstack => [internal] load build definition from Dockerfile 0.1s => => transferring dockerfile: 916B 0.0s => resolve image config for docker-image://docker.io/doc 2.3s => [auth] docker/dockerfile:pull token for registry-1.do 0.0s => CACHED docker-image://docker.io/docker/dockerfile:1@s 0.0s => [internal] load metadata for docker.io/library/node:2 2.4s => [auth] library/node:pull token for registry-1.docker. 0.0s => [internal] load .dockerignore 0.1s => => transferring context: 672B 0.0s => [build 1/6] FROM docker.io/library/node:22.2.0-alpine 0.0s => [internal] load build context 0.1s => => transferring context: 550B 0.0s => CACHED [runner 2/8] WORKDIR /app 0.0s => [runner 3/8] RUN mkdir -p ./uploads 0.3s => CACHED [build 2/6] RUN --mount=type=cache,target=/roo 0.0s => CACHED [build 3/6] WORKDIR /app 0.0s => CACHED [build 4/6] RUN --mount=type=bind,source=packa 0.0s => CACHED [build 5/6] COPY . . 0.0s => CACHED [build 6/6] RUN pnpm run build && pnpm prune - 0.0s => [runner 4/8] RUN chown -R node ./uploads 0.3s => [runner 5/8] RUN chmod 700 ./uploads 0.3s => [runner 6/8] COPY --from=build /app/dist ./dist 0.1s => [runner 7/8] COPY --from=build /app/node_modules ./n 0.2s => [runner 8/8] COPY --from=build /app/package.json ./p 0.1s => exporting to image 0.3s => => exporting layers 0.2s => => writing image sha256:05d88658b6d798e9e18fac006f8ee 0.0s => => naming to docker.io/library/hono 0.0sRun docker container
docker run -p 3333:3333 --name hono -d honoTry to upload file
ก็ลอง upload file เล่นๆกันได้
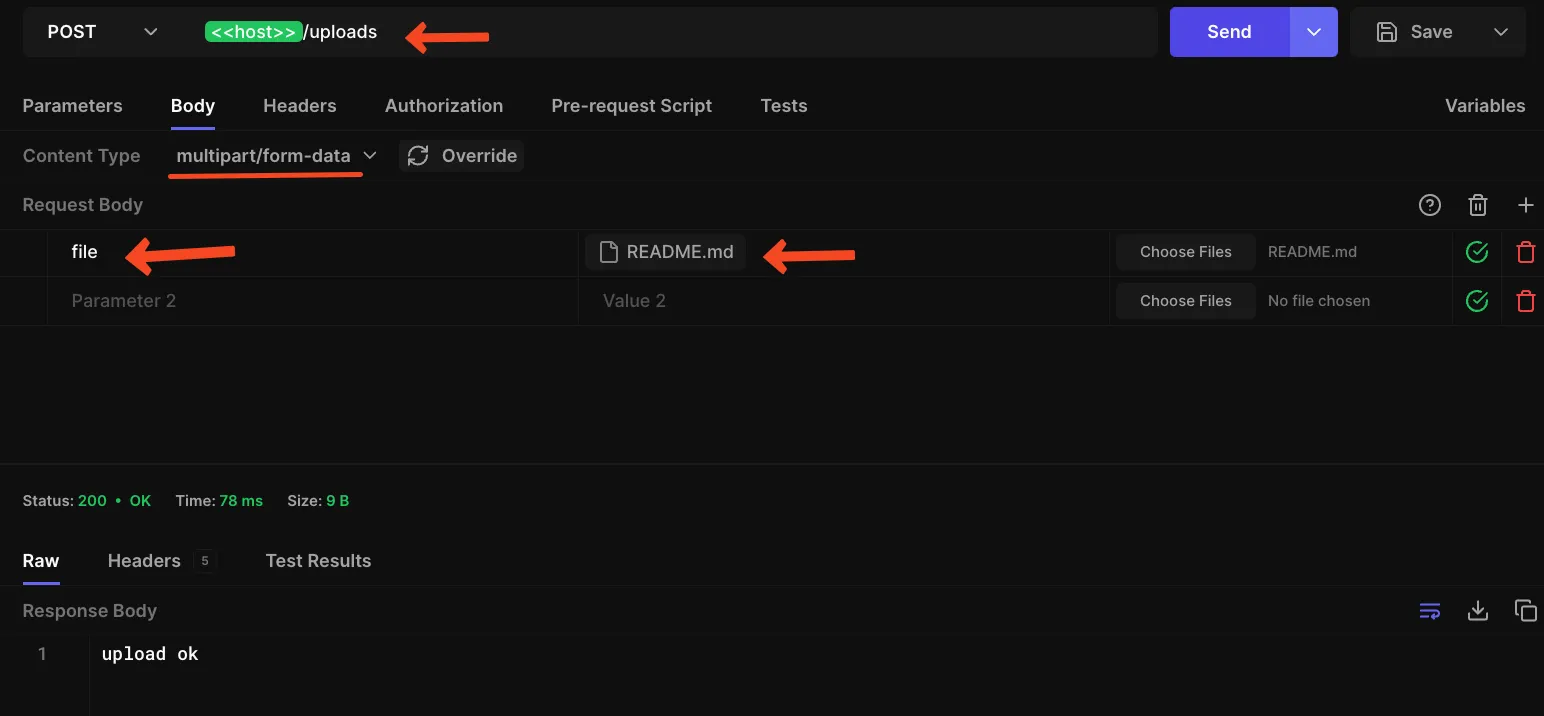
แล้วลองเปิดดูที่ http://localhost:3333/static/file-name
Add one more route
ก่อนจะจบตรงนี้ขอเพิ่ม route อีกอันนึง
app.get("/users", (c) => c.json( // return users { users: [ { name: "John", age: 41, }, { name: "Joceph", age: 62, }, ], }, 200, // status code ),);